Bare Flame game
This tutorial assumes that you have basic familiarity with using the command line, and the following programs on your computer (all of them are free):
Flutter, version 2.10.0 or above;
Android Studio, or any other IDE, for example Visual Studio Code;
git (optional), in order to save your project on GitHub.
1. Check flutter installation
First, let’s verify that your Flutter SDK was installed correctly and is accessible from the command line:
$ flutter doctor
[✓] Flutter (Channel stable, 2.10.0, on macOS 12.3.1 21E258 darwin-x64, locale en)
[✓] Android toolchain - develop for Android devices (Android SDK version 31.0.0)
[✓] Xcode - develop for iOS and macOS (Xcode 13.1)
[✓] Chrome - develop for the web
[✓] Android Studio (version 2020.3)
[✓] Connected device (1 available)
[✓] HTTP Host Availability
Your output will be slightly different, but the important thing is to verify that no errors are reported, and that your Flutter version is at least 2.10.0.
2. Create project directory
Now you need to come up with a name for your project. The name can only use lowercase latin letters, digits, and underscores. It must also be a valid Dart identifier (thus, for example, it cannot be a keyword).
In this tutorial we’re going to call the project syzygy, which is a totally real non-made-up word.
Create the directory for your new project:
$ mkdir -p ~/projects/syzygy
$ cd ~/projects/syzygy
3. Initialize empty Flutter project
In order to turn this barren directory into an actual Flutter project, run the following command:
$ flutter create .
(I have omitted the output for brevity, but there will be lots of output).
You can verify that the project files were created successfully:
$ ls
README.md               android/   lib/           pubspec.yaml   test/
analysis_options.yaml   ios/       pubspec.lock   syzygy.iml     web/
4. Open the project in Android Studio
Launch Android Studio, then in the project selection window choose [Open]
and navigate to your project directory. With any luck, the project will now
look like this:
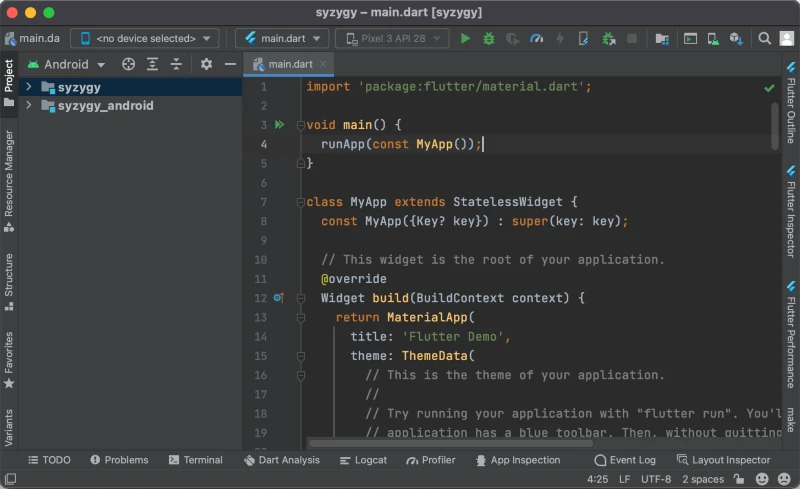
If you see only the main.dart file but not the side panel, then click the
vertical [Project] button at the left edge of the window.
Before we proceed, let’s fix the view in the left panel. Locate the button
in the top left corner that says [Android] in the screenshot. In this
dropdown select the first option “Project”. Your project window should now
look like this:
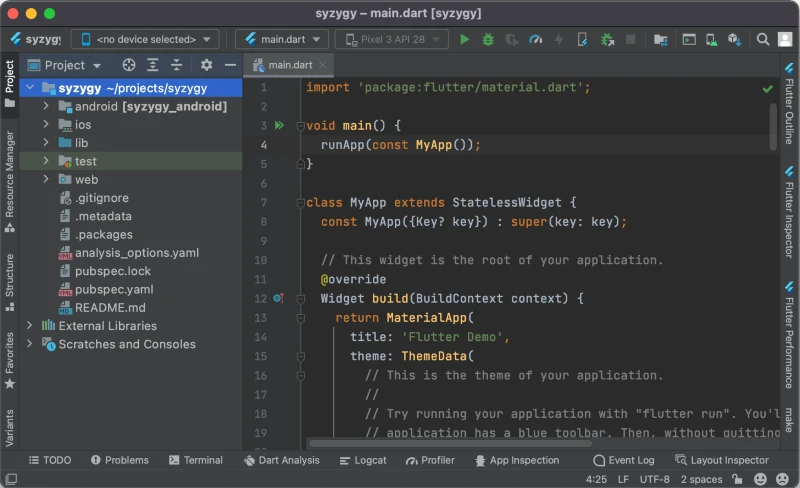
The important part is that you should be able to see all files in your project directory.
5. Clean up the project files
The default project created by Flutter is not very useful for making a Flame game, so we should get rid of it.
First, open the file pubspec.yaml and replace it with the following code
(adjusting the name and description to match your project):
name: syzygy
description: Syzygy Flame game
version: 0.0.0
publish_to: none

environment:
  sdk: ^2.16.0
  flutter: ^2.10.0

dependencies:
  flutter:
    sdk: flutter
  flame: ^1.1.0
After that, press the [Pub get] button at the top of the window; or
alternatively you could run command flutter pub get from the terminal. This
will “apply” the changes in pubspec file to your project, in particular it
will download the Flame library which we have declared as a dependency. In the
future, you should run flutter pub get whenever you make changes to this
file.
Now, open file lib/main.dart and replace its content with the following:
import 'package:flame/game.dart';
import 'package:flutter/widgets.dart';

void main() {
  final game = FlameGame();
  runApp(GameWidget(game: game));
}
Lastly, remove the file test/widget_test.dart completely.
6. Run the project
Let’s verify that everything is working as intended, and the project can run.
In the menu bar at the top of the window find a dropdown that says <no device selected>. In that dropdown choose <Chrome (web)> instead.
After that open the main.dart file and press the green arrow next to the
void main() function in line 4. Select [Run main.dart] from the menu.
This should open a new Chrome window (which may take 10-30 seconds) and run your project in that window. For now it will simply show a black screen, which is expected because we created the game in its simplest blank configuration.
7. Sync to GitHub
The last step is to upload your project to GitHub. This is not required, but strongly recommended as it will serve as a backup for your code. This step assumes that you already have a GitHub account.
Log into your GitHub account, select [Your repositories] from your profile
dropdown, and press the green [New] button. In the form enter repository
name the same as your project name; select type “private”; and opt out of
adding initial files like README, license and gitignore.
Now go to your project’s directory in the terminal and execute the following commands (make sure to replace the URL with the link to the repository that you just created):
$ git init
$ git add --all
$ git commit -m 'Initial commit'
$ git remote add origin https://github.com/your-github-username/syzygy.git
$ git branch -M main
$ git push -u origin main
At this point if you go to your repository page on GitHub, you shall see that all your project files are there.
8. Done
That’s it! By this point you have
Created an initial blank state Flame project;
Set up the Android Studio IDE for that project;
Created a GitHub repository for the project.
Happy coding!