3. Shader
Considerations
In this section we will create the fragment (pixel) shader program that runs on the GPU.
Keep in mind that shader code requires different thinking from regular Dart code, since the fragment shader runs once per pixel, every frame.
Note
Be mindful of branching and looping in shaders, as operations scale linearly with pixel count and loop iterations per frame.
Note
Shader optimization is out of scope for this tutorial. As a
quick example, comparing squared distances instead of using
sqrt would be more efficient.
Shader code
Create a new directory at assets/shaders/ and a file named outline.frag:
#version 460 core

precision mediump float;

#include <flutter/runtime_effect.glsl>

uniform vec2 uSize;
uniform float uOutlineWidth;
uniform vec4 uOutlineColor;
uniform sampler2D uTexture;

const int MAX_SAMPLE_DISTANCE = 8;

out vec4 fragColor;

void main() {
  vec2 uv = FlutterFragCoord().xy / uSize;
  vec4 texColor = texture(uTexture, uv);

  // If the current pixel is not transparent, render the original color
  if (texColor.a > 0.0) {
    fragColor = texColor;
    return;
  }

  // Check surrounding pixels for outline
  vec2 texelSize = 1.0 / uSize;
  bool foundOpaqueNearby = false;

  // Sample in the bounding square pattern around the current pixel
  // You must use static const loop counts in GLSL
  for (int x = -MAX_SAMPLE_DISTANCE; x <= MAX_SAMPLE_DISTANCE; x++) {
    for (int y = -MAX_SAMPLE_DISTANCE; y <= MAX_SAMPLE_DISTANCE; y++) {
      if (x == 0 && y == 0) continue;

      // Check real distance instead of manhattan distance
      float distance = sqrt(float( x*x + y*y ));
      if (distance > uOutlineWidth) continue;

      // Sample the shifted pixel from the current pixel (uv)
      vec2 offset = vec2(float(x), float(y)) * texelSize;
      vec4 sampleColor = texture(uTexture, uv + offset);

      if (sampleColor.a > 0.0) {
        // We found solid color in the iteration --> sprite is nearby
        foundOpaqueNearby = true;
        break;
      }
    }
    // Break out from outer loop too
    if (foundOpaqueNearby) break;
  }

  if (foundOpaqueNearby) {
    fragColor = uOutlineColor;
  } else {
    fragColor = vec4(0.0, 0.0, 0.0, 0.0);
  }
}
For each transparent pixel, the shader checks whether any nearby pixel is opaque. If so, it
colors the pixel with the outline color (passed in as a uniform). Otherwise, it stays fully
transparent. This is why transparent .png images are required.
Note
GLSL loop bounds must be compile-time constants, so the
uOutlineWidth uniform cannot be used directly. Make sure
MAX_SAMPLE_DISTANCE is at least as large as the outline
width you set in Dart.
Shader resource
Register the shader in pubspec.yaml so Flutter bundles it at build time:
flutter:
  assets:
    - assets/images/
  shaders:
    - assets/shaders/outline.frag
Run the application. You should now see two sprites: one plain and one with a colored outline.
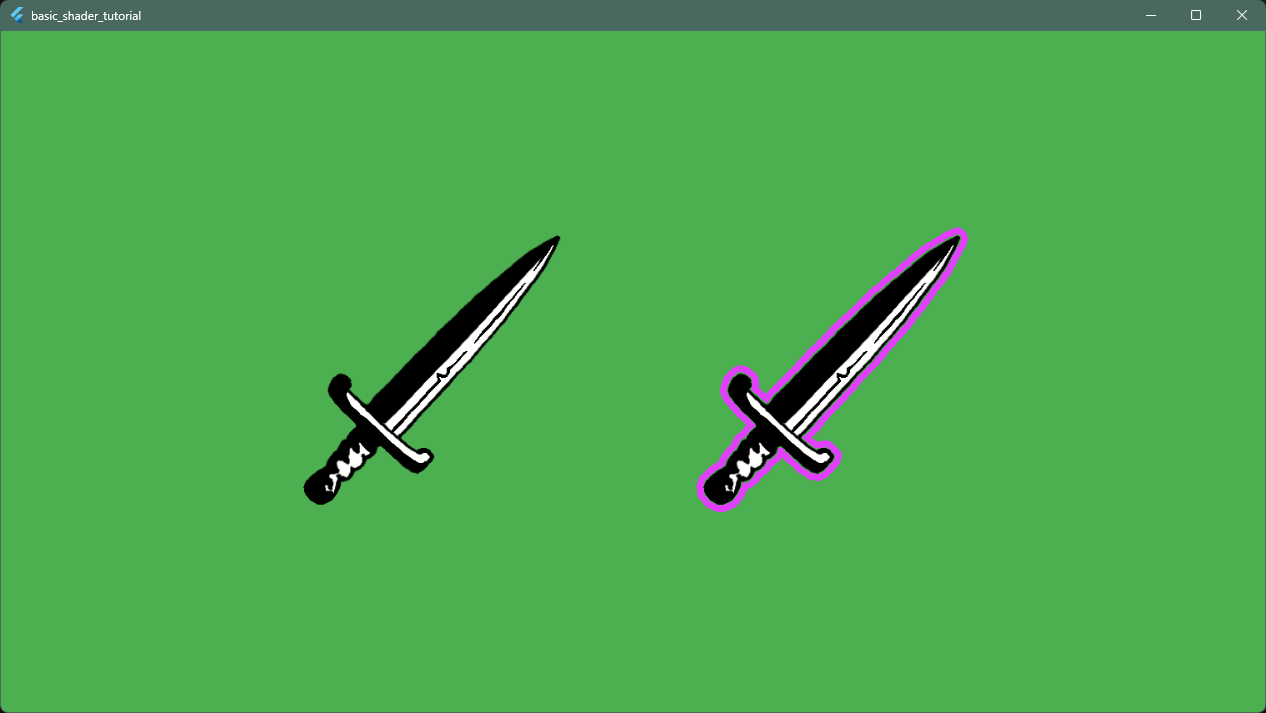
The basic shader is working. It’s time to experiment!