6. Adding the HUD
Setting up the HUD
Now that the game is up and running, the rest of the code should come fairly easily. To prepare for
the hud, we need to add some variables in lib/ember_quest.dart. Add the following to the top of
the class:
int starsCollected = 0;
int health = 3;
Start by creating a folder called lib/overlays, and in that folder, create a component called
heart.dart. This is going to be the health monitoring component in the upper left-hand corner of
the game. Add the following code:
import 'package:ember_quest/ember_quest.dart';
import 'package:flame/components.dart';

enum HeartState {
  available,
  unavailable,
}

class HeartHealthComponent extends SpriteGroupComponent<HeartState>
    with HasGameReference<EmberQuestGame> {
  final int heartNumber;

  HeartHealthComponent({
    required this.heartNumber,
    required super.position,
    required super.size,
    super.scale,
    super.angle,
    super.anchor,
    super.priority,
  });

  @override
  Future<void> onLoad() async {
    await super.onLoad();
    final availableSprite = await game.loadSprite(
      'heart.png',
      srcSize: Vector2.all(32),
    );

    final unavailableSprite = await game.loadSprite(
      'heart_half.png',
      srcSize: Vector2.all(32),
    );

    sprites = {
      HeartState.available: availableSprite,
      HeartState.unavailable: unavailableSprite,
    };

    current = HeartState.available;
  }

  @override
  void update(double dt) {
    if (game.health < heartNumber) {
      current = HeartState.unavailable;
    } else {
      current = HeartState.available;
    }
    super.update(dt);
  }
}
The HeartHealthComponent is just a SpriteGroupComponent
that uses the heart images that were created early on. The unique thing that is being done, is when
the component is created, it requires a heartNumber, so in the update method, we check to see if
the game.health is less than the heartNumber and if so, change the state of the component to
unavailable.
To put this all together, create hud.dart in the same folder and add the following code:
import 'package:flame/components.dart';
import 'package:flutter/material.dart';

import '../ember_quest.dart';
import 'heart.dart';

class Hud extends PositionComponent with HasGameReference<EmberQuestGame> {
  Hud({
    super.position,
    super.size,
    super.scale,
    super.angle,
    super.anchor,
    super.children,
    super.priority = 5,
  });

  late TextComponent _scoreTextComponent;

  @override
  Future<void> onLoad() async {
    _scoreTextComponent = TextComponent(
      text: '${game.starsCollected}',
      textRenderer: TextPaint(
        style: const TextStyle(
          fontSize: 32,
          color: Color.fromRGBO(10, 10, 10, 1),
        ),
      ),
      anchor: Anchor.center,
      position: Vector2(game.size.x - 60, 20),
    );
    add(_scoreTextComponent);

    final starSprite = await game.loadSprite('star.png');
    add(
      SpriteComponent(
        sprite: starSprite,
        position: Vector2(game.size.x - 100, 20),
        size: Vector2.all(32),
        anchor: Anchor.center,
      ),
    );

    for (var i = 1; i <= game.health; i++) {
      final positionX = 40 * i;
      await add(
        HeartHealthComponent(
          heartNumber: i,
          position: Vector2(positionX.toDouble(), 20),
          size: Vector2.all(32),
        ),
      );
    }
  }

  @override
  void update(double dt) {
    _scoreTextComponent.text = '${game.starsCollected}';
  }
}
In the onLoad method, you can see where we loop from 1 to the game.health amount, to create
the number of hearts necessary. The last step is to add the hud to the game.
Go to lib/ember_quest.dart and add the following code in the initializeGame method:
camera.viewport.add(Hud());
If the auto-import did not occur, you will need to add:
import 'overlays/hud.dart';
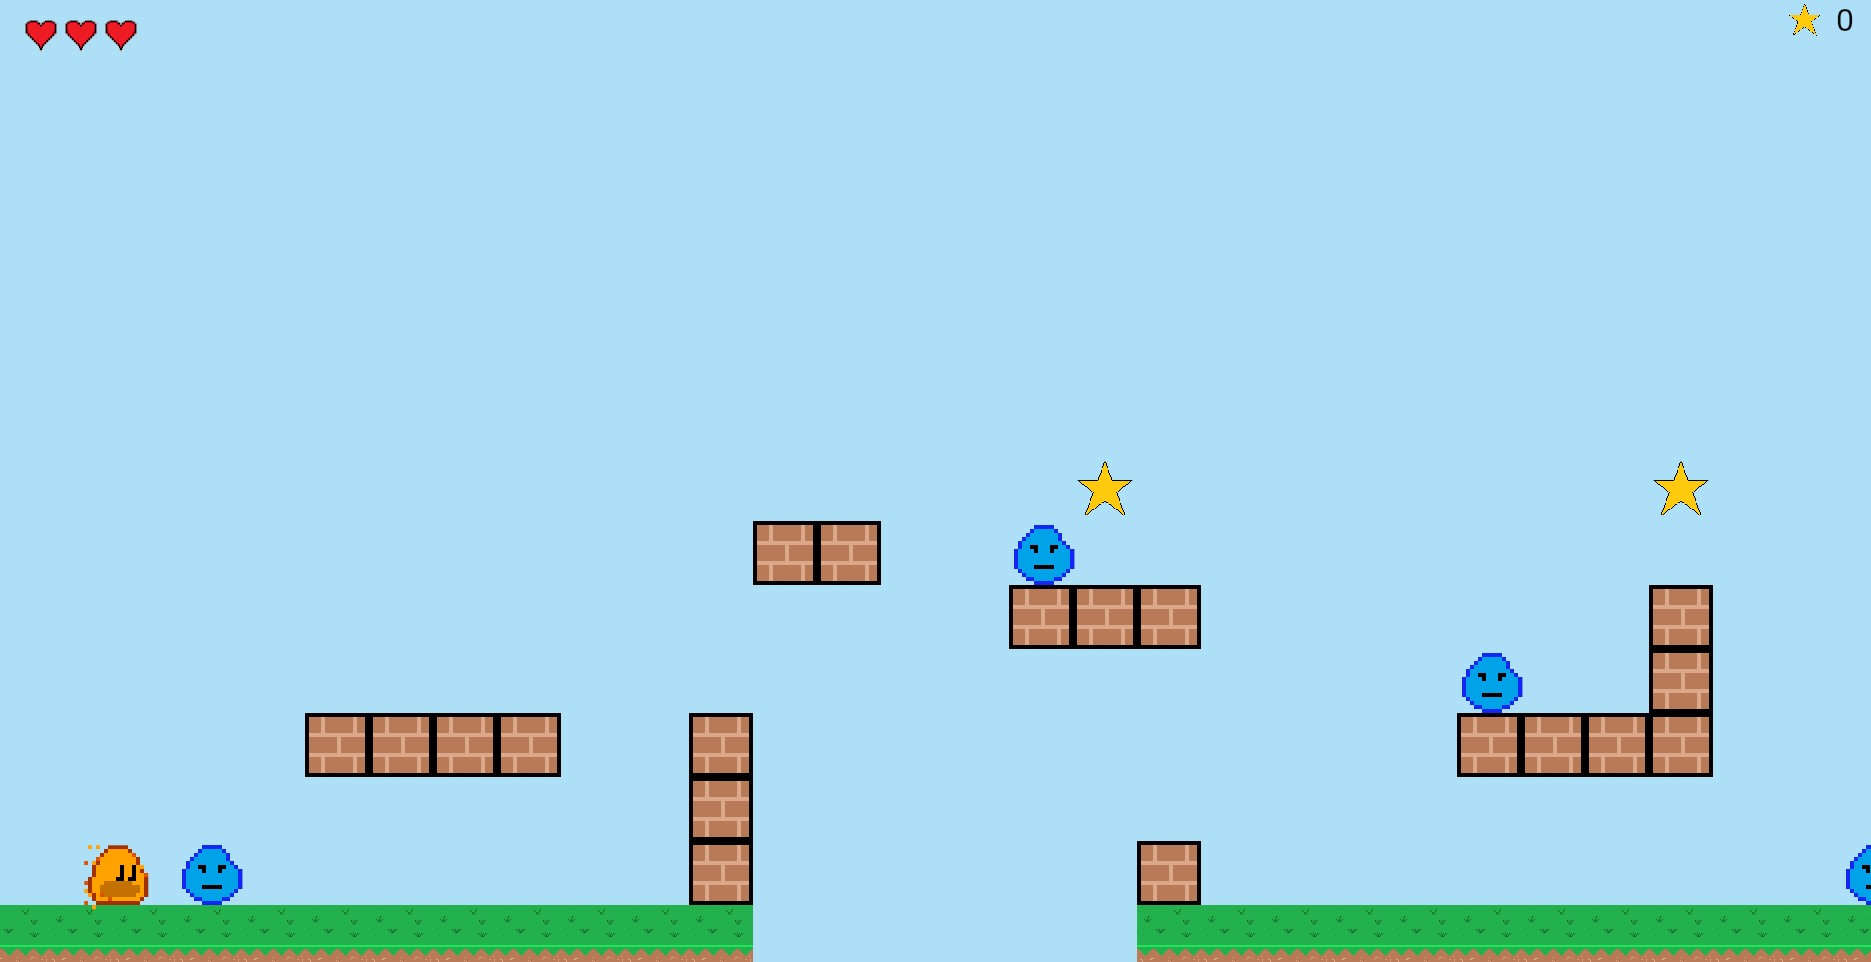
If you run the game now, you should see:

Updating the HUD Data
The last thing we need to do before closing out the HUD is to update the data. To do this, we need
to open lib/actors/ember.dart and add the following code:
onCollision
if (other is Star) {
  other.removeFromParent();
  game.starsCollected++;
}
void hit() {
  if (!hitByEnemy) {
    game.health--;
    hitByEnemy = true;
  }
  add(
    OpacityEffect.fadeOut(
      EffectController(
        alternate: true,
        duration: 0.1,
        repeatCount: 5,
      ),
    )..onComplete = () {
      hitByEnemy = false;
    },
  );
}
If you run the game now, you will see that your health is updated and the stars are incremented as appropriate. Finally, in 7. Adding Menus, we will finish the game by adding the main menu and the game-over menu.
